How to Create a Brand Kit in Canva
- Diana Sparacio

- Dec 22, 2025
- 4 min read
Are you new to Canva? Or just learning how to save time while keeping brand consistency for your team? Look no further than this guide. In it, we walk you through everything you need to know to build a professional brand kit in Canva—from uploading your logo to setting your brand fonts and colors.

Whether you’re a solo creator or part of a growing team, your kit ensures every design looks polished, consistent, and on-brand.
Why Your Brand Kit Matters
A strong brand needs more than a great logo. It needs cohesion. And consistency.
Whether you’re designing social posts, presentations, or proposals, a brand kit keeps your visuals aligned with your identity. And Canva makes that process incredibly easy by allowing you to store and apply your brand colors, fonts, and logos to everything you create there, automatically.
Here’s how to build your brand kit in Canva.
Step 1: Access the Brand Kit
Log into Canva
In the left sidebar, click Brand
NOTE: If you’re using Canva Pro, you’ll have access to multiple brand kits. This is perfect if you manage multiple clients or sub-brands.

Step 2: Add Your Logo
Your logo is the visual anchor of your brand.
In the left sidebar, click Logos
Click + Add to Category in the upper right
Select Upload Brand Assets
Search for and click on your logo file
Click Open
Repeat for all logo files you want to upload
Once your logos are uploaded, you can drag and drop them into any design.
Tip: Upload primary and secondary variations of your logo, including a transparent PNG file if you plan to create overlays. Be sure to name your logo variations clearly so your team can find them easily (for example: “Main Logo - Full Color,” or “White Logo - Transparent Background”).

Step 3: Set Your Brand Colors
Choose up to three main colors to define your brand palette.
In the left sidebar, click Colors
In the Color Palette window, click Add new
Enter your HEX codes for a precise match to your brand color
Repeat for all colors in your primary palette
Tip: Canva lets you create multiple color palettes. Use this feature when managing distinct product lines or marketing campaigns.

Step 4: Choose Your Brand Fonts
Typography defines your tone just as much as visuals do.
In the left sidebar, click Fonts
Click into each of the menu options to set your Heading, Subheading, and Body fontsNOTE: If you’re on Canva Pro, you can upload your own custom fonts (e.g., your licensed brand fonts)
For each text style, set your font size and text weight (bold, regular, light)
Click the trash can icon to delete and text styles from the menu you that you don’t intend to use
Tip: Try to stick with two to three complementary fonts for balance.

Step 5: Add Your Brand Voice
Your brand voice shapes how people perceive your business. Are you approachable and friendly? Sophisticated and confident? Educational and direct? This is your chance to define it.
In the left sidebar, click Brand Voice
In the text field, provide 3-5 adjectives that describe your tone
Add examples of words or phrases you do and don’t use
Keep this short summary pinned or linked within your Canva Brand Kit or your internal brand guidelines document
Tip: Use this voice consistently across headlines, captions, and calls to action to strengthen your identity.

Step 6: Choose Your Brand Photos
Photography plays a huge role in visual consistency.
In the left sidebar, click Photos
Upload your approved brand photos
Stick to a recognizable style—consider lighting, filters, color temperature, and composition
Include imagery that aligns with your values and audience
Tip: Only upload photos that match your brand and desired style. That makes it harder to use off-brand imagery later on.

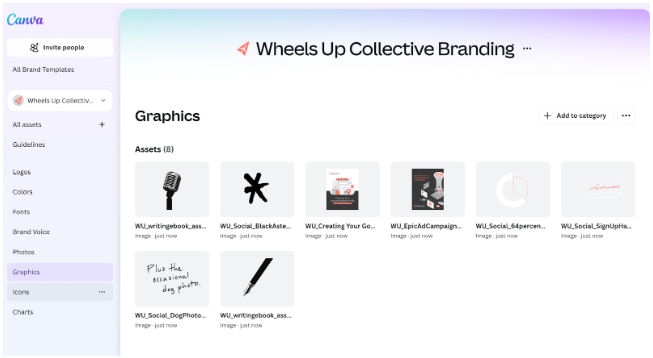
Step 8: Select Your Brand Graphics
Graphics and illustrations should complement your logo and color palette.
In the left sidebar, click Graphics
Choose a visual style (flat, gradient, minimalist, abstract, etc.)
Keep line thickness, shapes, and proportions consistent
Upload your own or curate a shared folder of approved visuals
Tip: When using Canva’s built-in illustrations in the element section, you can use the graphic’s menu to “star” (favorite) styles that fit your brand. That way, your team can easily find them later.

Step 9: Add Your Brand Icons
Icons are small but powerful. They make your visuals clearer and more polished.
In the left sidebar, click Icons
Select a single icon style (outlined, filled, rounded, or line) to easily maintain consistent sizing and spacing across designs
Create an “Icons” folder within your Brand Kit for quick access
Tip: Avoid mixing multiple icon styles in one design. It breaks visual harmony.

Step 10: Share and Maintain Your Brand Kit
Your brand kit isn’t static. It should grow with your business.
Invite teammates with Edit or View access
Update your kit when you refresh your branding
Archive outdated logos, fonts, color palettes, and photos to keep things organized
Tip: Set a calendar reminder to revisit your brand kit quarterly to ensure all visuals align with new campaigns or rebrands.
Bring Your Brand to Life
Creating a brand kit in Canva ensures that every visual asset you produce reflects your company’s identity. Whether you’re a solo marketer or managing a full creative team, a well-built brand kit saves time, strengthens brand recognition, and helps your work stand out for all the right reasons.


